Computer Vision
Using OpenCV to identify a dice roll
After a heated game of Yatzee! with my family, I began to suspect that the dice we were playing with were loaded. While all other players were able to roll fours, despite my best efforts, I was unable to roll this number. I lost the game, finishing last. Clearly something was up with these dice (or perhaps I am a sore loser).

This thread gave me all the info I needed to mathematically prove that the dice we were playing with were not fair. However, it required a lot of tedious work to get the data needed for this verification. If only I could automate that... And that's how I set out to teach my computer how to read dice rolls (and not actually verify if they were fair)!
For this project, I used OpenCV in Python to implement a small algorithm that counts the number of a dice roll. Other equipment needed: a set of dice , a box to act as a dice roll container, and a smartphone, to provide a camera for this computer vision project.
The goal: processing a live video feed coming from my smartphone and overlay the number the computer saw for each rolled dice over the dice themselves.
Getting started
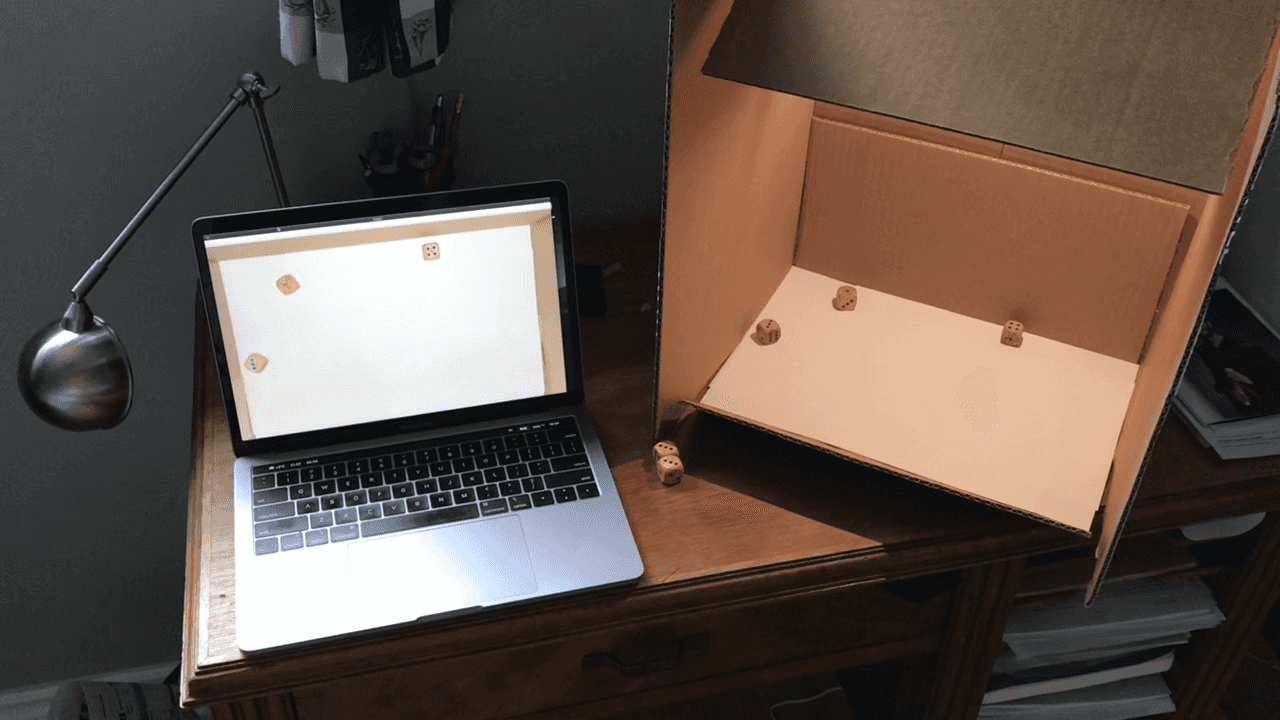
This script assumes our camera is looking at our dice face down. I created a testing rig to control for the camera position and ensure there was sufficient lighting.
This project requires OpenCV, sklearn and numpy to be installed on your machine.
pip install opencv-python numpy sklearn
I started by importing OpenCV and numpy, and by initializing a video feed.
import cv2import numpy as npfrom sklearn import cluster# Initialize a video feedcap = cv2.VideoCapture(0)
Everything happens in a loop, processing each video feed image one by one. I defined the general algorithm using a series of functions and I will go more in detail regarding the implementation of each function throughout this article.
while(True):# Grab the latest image from the video feedret, frame = cap.read()# We'll define these laterblobs = get_blobs(frame)dice = get_dice_from_blobs(blobs)out_frame = overlay_info(frame, dice, blobs)cv2.imshow("frame", frame)res = cv2.waitKey(1)# Stop if the user presses "q"if res & 0xFF == ord('q'):break# When everything is done, release the capturecap.release()cv2.destroyAllWindows()
Isolating dice dots
The first steps is to locate dice dots. I applied the OpenCV simple blob detection algorithm.
Glare was a problem as the dice dots were glossy and reflecting the light from the smartphone. This created white spots which interfered with the detection algorithm. I applied a **median blur** on the frame before using the blob detection function provided by OpenCV.
Some blobs may not be associated with dice dots. I filtered them according to a inertia heuristic. I assumed the dice dots to be circular. Hence, they should appear circular in the image (as I am capturing them directly face down). A non-circular blob is either part of a dice face not directly face-up, or noise in the image.
Inertia is a ratio giving a measure of how round a blob is. A low inertia ratio indicates a more elongated blob (closer to a line), while a perfectly cirular blob will have an inertia ratio of one. Hence, I filtered contours that had an inertia ratio smaller than .
# Setting up the blob detectorparams = cv2.SimpleBlobDetector_Params()params.filterByInertiaparams.minInertiaRatio = 0.6detector = cv2.SimpleBlobDetector_create(params)def get_blobs(frame):frame_blurred = cv2.medianBlur(frame, 7)frame_gray = cv2.cvtColor(frame_blurred, cv2.COLOR_BGR2GRAY)blobs = detector.detect(frame_gray)return blobs
Identify individual dice
After isolating dice dots, I ended up with an array of dice dots contours. The next step is to merge these contours together into individual dice.
Density-based clustering was the method I used to perform this operation, specifically DBSCAN. Density-based clustering avoids having to set the number of clusters as it is automatically calculated based on the data itself. I calculated the centroid of each dot blob and used DBSCAN to assign a cluster to each dot, with hyper-parameter .
With these labels, I knew where each dice dot was in the image, and the dice it belonged to.
def get_dice_from_blobs(blobs):# Get centroids of all blobsX = []for b in blobs:pos = b.ptif pos != None:X.append(pos)X = np.asarray(X)if len(X) > 0:# Important to set min_sample to 0, as a dice may only have one dotclustering = cluster.DBSCAN(eps=40, min_samples=0).fit(X)# Find the largest label assigned + 1, that's the number of dice foundnum_dice = max(clustering.labels_) + 1dice = []# Calculate centroid of each dice, the average between all a dice's dotsfor i in range(num_dice):X_dice = X[clustering.labels_ == i]centroid_dice = np.mean(X_dice, axis=0)dice.append([len(X_dice), *centroid_dice])return diceelse:return []
Reporting back our findings
Finally, I overlayed all the blobs and the numbers associated with each dice back on the image.
def overlay_info(frame, dice, blobs):# Overlay blobsfor b in blobs:pos = b.ptr = b.size / 2cv2.circle(frame, (int(pos[0]), int(pos[1])),int(r), (255, 0, 0), 2)# Overlay dice numberfor d in dice:# Get textsize for text centeringtextsize = cv2.getTextSize(str(d[0]), cv2.FONT_HERSHEY_PLAIN, 3, 2)[0]cv2.putText(frame, str(d[0]),(int(d[1] - textsize[0] / 2),int(d[2] + textsize[1] / 2)),cv2.FONT_HERSHEY_PLAIN, 3, (0, 255, 0), 2)
And because I thought it could be an interesting extension to this project, I made my computer say the numbers shown on the dice out loud.
There you have it! It was a good project to practice a computer vision problem. In case you need to have your computer automatically read dice numbers for you, you can find all the code for this small project in this Gist!

