Computer Vision
Using OpenCV to solve a sudoku
I recently acquired a pretty fun new hobby, solving sudokus. In that process, I discovered a new YouTube channel, Cracking the Cryptic, which is releasing two new sudoku puzzles every day. I have been diligently attempting these new puzzles and practicing easier puzzles on a sudoku book I have at home.
While struggling to solve another sudoku (rated as "easy" which is probably incorrect), I thought of another computer vision project: could my computer solve sudoku from a picture of one?

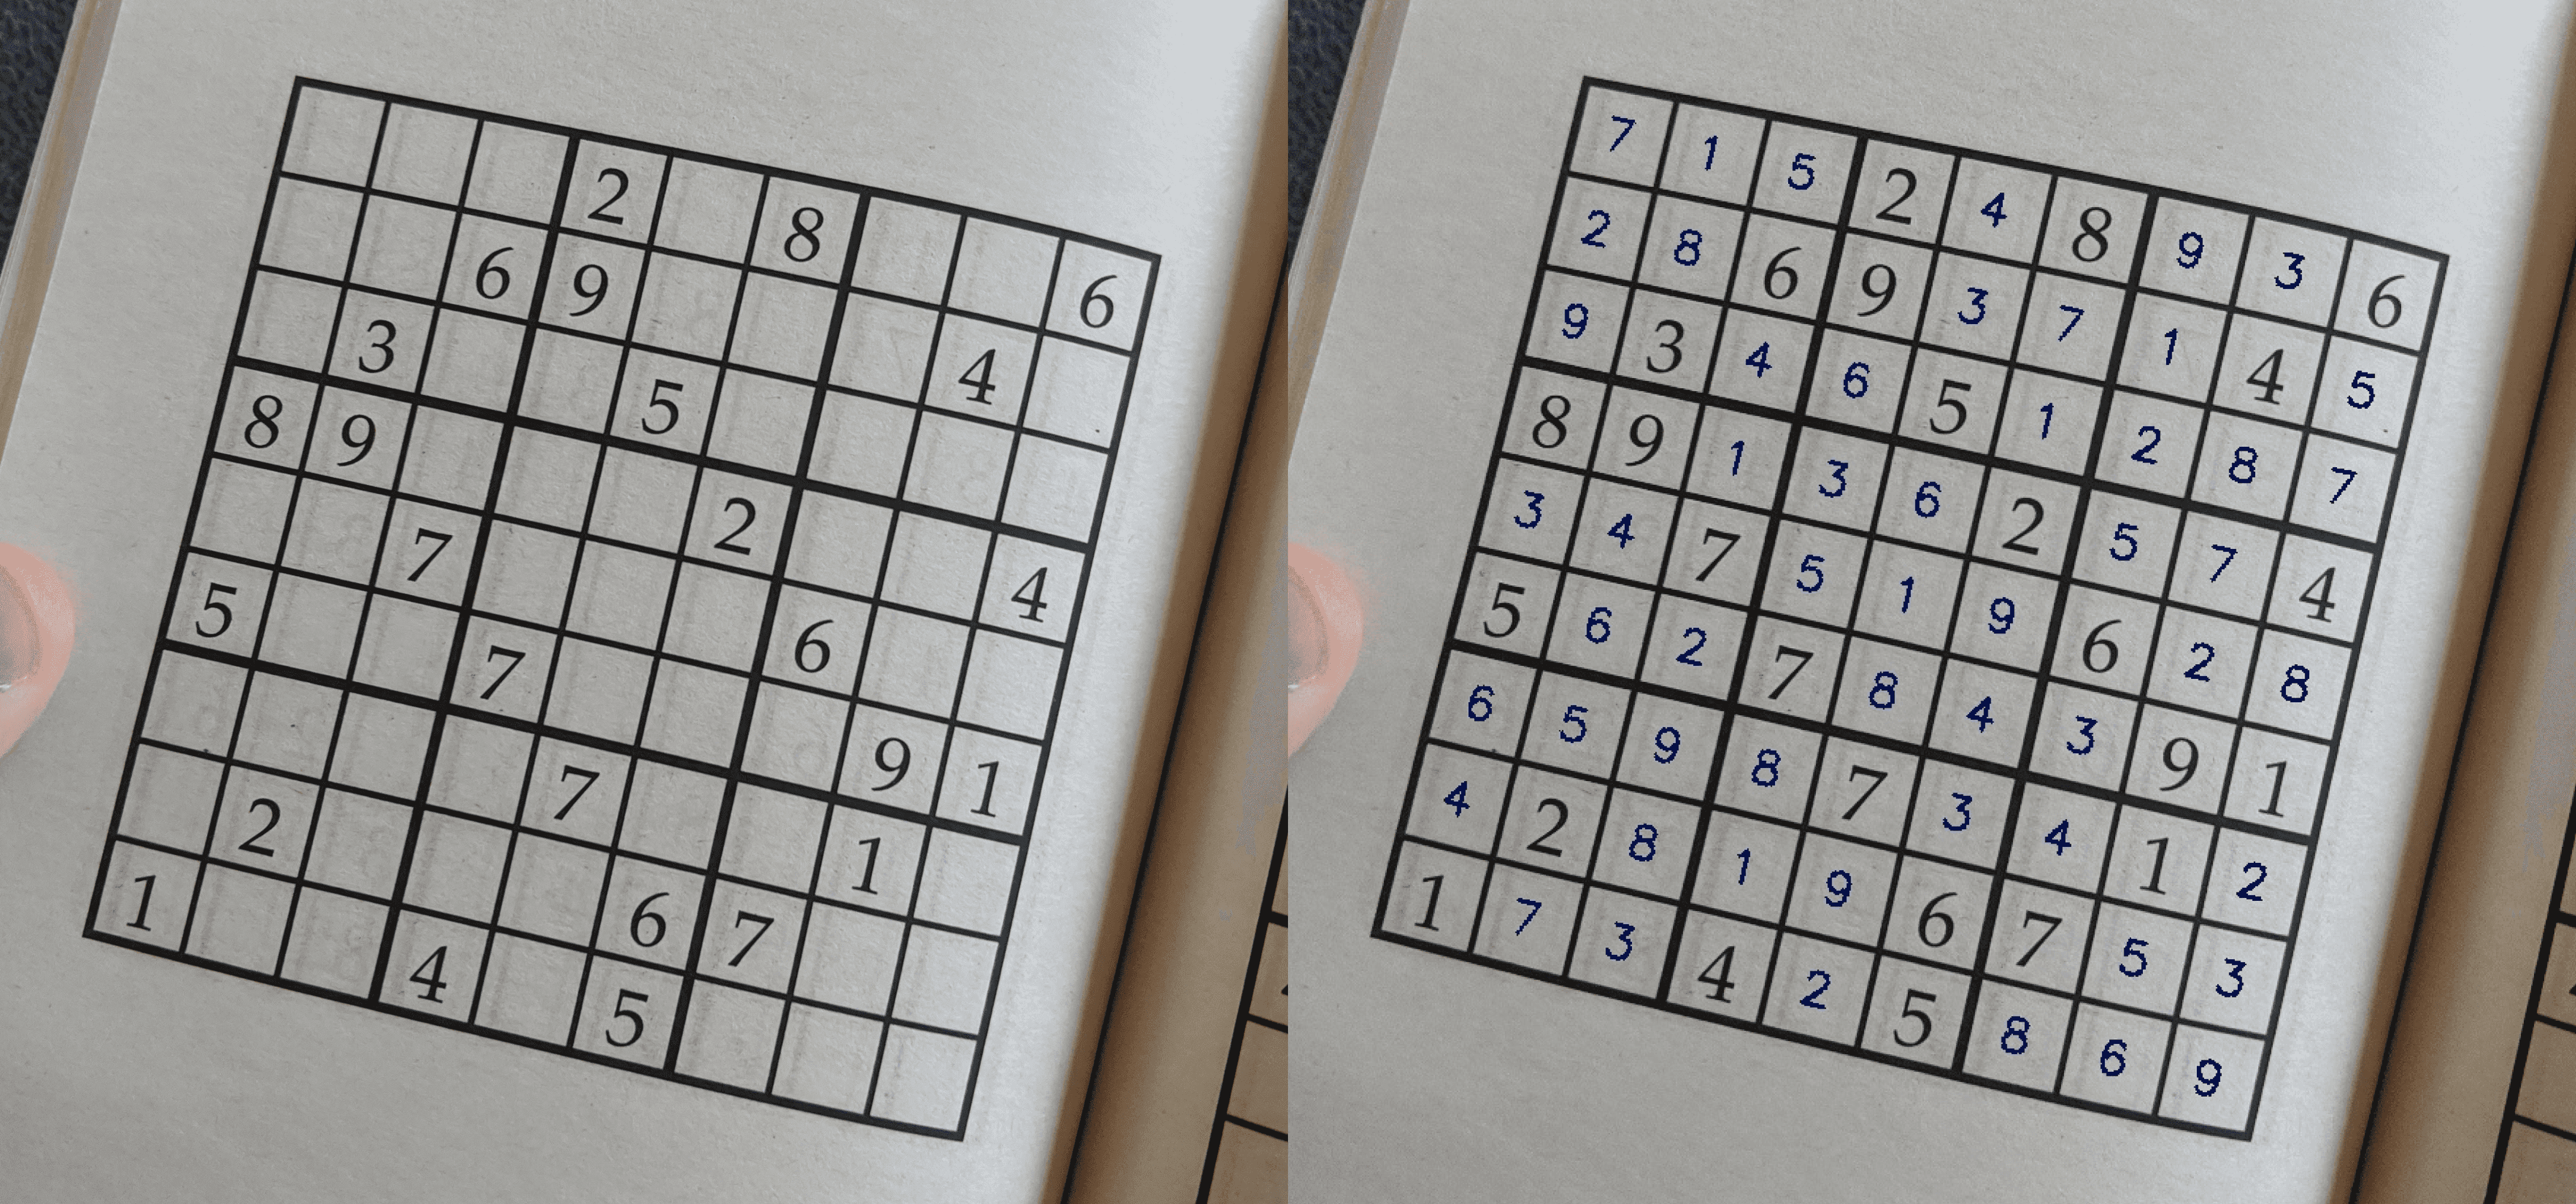
I want to be able to recognize the sudoku in an image, adjust for perspective, identify the numbers in the grid, and solve the sudoku. I then want to print the solution back into the image, adjusting for perspective. This article will cover the algorithm I created to process images of sudokus. It consists of the following steps:
- Find the sudoku grid in an image
- Perform a perspective warp to create a top-down view of the sudoku
- Split the sudoku image into its cells
- Identify the number in each cell (or lack thereof)
- Identify the row and column number for each cell
- Solve the sudoku
- Write the result in the original image, adjusting for perspective
Getting started
This project will require OpenCV, sklearn, and numpy installed on your machine.
pip install opencv-python numpy sklearn
Let's start by importing our dependencies:
import cv2import numpy as npimport globimport os
I will be processing images in a folder. I process images one by one, first resizing them to a more manageable size to help with processing. The code below will form the main loop of this image processing task. I will be processing images in a folder.
if __name__ == "__main__":for file_path in glob.glob("in/*.jpg"):img = cv2.imread(file_path)# Ensure we keep the aspect ratio of the imageratio = img.shape[0] / img.shape[1]img = cv2.resize(img, (1100, int(1100 * ratio)))valid, img_grid, M = find_grid(img)# If no grid were found, give upif valid == False:continue# Generate a 2D array representation of the grid present in the imagecells = find_cells(img_grid)cells_with_value = find_cell_values(cells)grid, grid_meta = get_sudoku_grid(cells_with_value)# Solve the sudokuempty_cells = [(i, j) for i in range(9) for j in range(9) if grid[i][j] == 0]is_grid_solved = solve(grid, empty_cells)# Print the solution back in the imageif is_grid_solved:img_out = print_solution(img, img_grid, M, grid, grid_meta)cv2.imwrite(f"out/{os.path.split(file_path)[-1]}", img_out)
Finding the sudoku grid in an image
I am looking for a large square consisting of 81 smaller squares. This square can be taken from any perspective. In other words, I am looking for a quadrilateral in an image.

Looking for quadrilaterals
I will be using OpenCV contours to find quadrilaterals. After thresholding the image (using adaptive thresholding), I can generate a list of contours present in the image. I then need to filter these contours to only those that closely resemble a quadrilateral.
cv2.arcLength and cv2.approxPolyDP are used to detect quadrilaterals.cv2.arcLength returns the length of the perimeter of a contour while cv2.approxPolyDPreturns a contour forming an approximation of the contour passed as argument. The approximation is controlled by a parameter, , which defines the maximum variance between the perimeter of the approximation and the original contour. cv2.approxPolyDP is useful when trying to find contours that approximates a quadrilateral. If the approximate contour has four points while is kept to a low value (here of the perimeter of the original contour), I know I have a quadrilateral.
To verify if I found the contour of the sudoku grid (and not the contour of a cell of the grid for example), I check that the contour contains 81 smaller quadrilaterals. If this is the case, it is very likely that I found the sudoku grid.
# Approximate the contour in order to determine whether the contour is a quadrilateralperi = cv2.arcLength(c, True)approx = cv2.approxPolyDP(c, 0.01 * peri, True)# We are looking for a contour that is roughly a quadrilateralif len(approx) == 4:warped, M = four_point_transform(thresh,np.array([approx[0][0], approx[1][0], approx[2][0], approx[3][0]]),)cells = find_cells(warped)# We can be fairly certain we found a sudoku grid if the grid contains 81 cellsif len(cells) == 81:return True, warped, M
Perspective correction
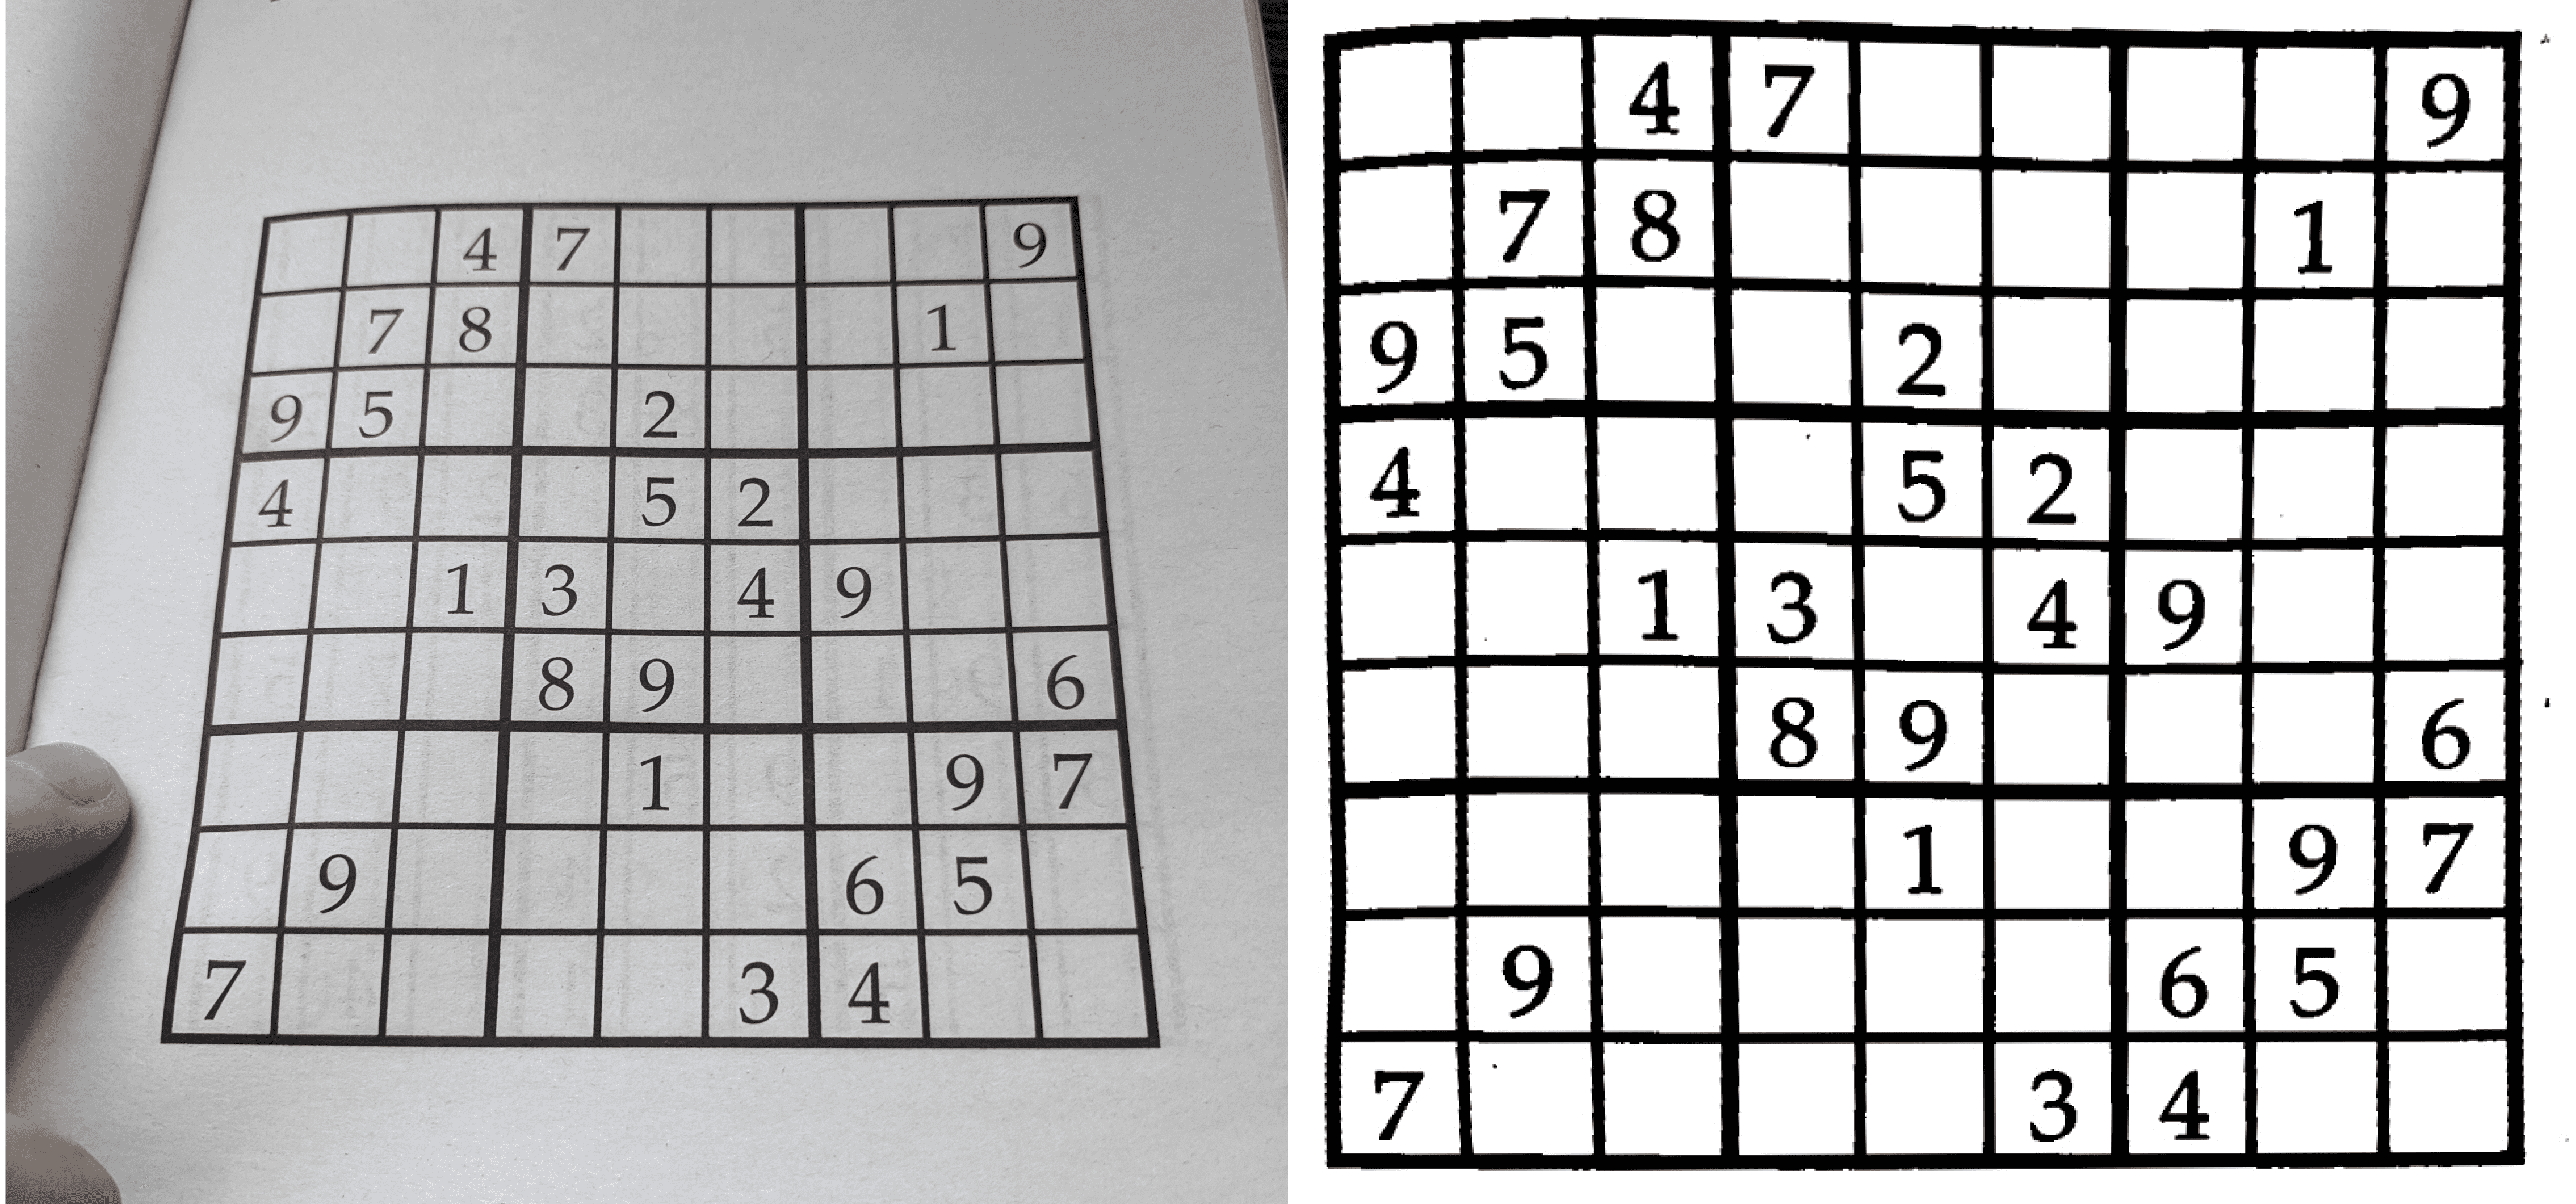
Two images of the same planar surface are related by a homography.If we can determine the plane of the sudoku grid, we can create a new image where the grid appears directly below the camera (ie. on the image plane). This process is also known as perspective removal.
To find a homography matrix, I need to find four corresponding points shared between the two images. I already have four points from our initial image when I located the sudoku grid. The corresponding points in the perspective corrected image are the four corners of the image.
OpenCV allows us to calculate a homography matrix and apply the perspective correction to an image.
# rect contains the four points of the sudoku grid square in the original image# dst contains the four points representing the four corners of the warped imageM = cv2.getPerspectiveTransform(rect, dst)warped = cv2.warpPerspective(img, M, (max_width + 10, max_height + 10))

Extracting each cell in the grid
I need to extract each cell from the warped image to read their value when creating a 2D array of the sudoku grid. I apply the same methods that I used to find the sudoku grid.
Representing the sudoku grid as a 2D array
Retrieving the number in each cell
I have an image of all the 81 cells of the sudoku, corrected for perspective. Now I need to extract the number printed in each cell (if it exists). For this, I trained a k-nearest neighbours classifier on a subset of the cell images taken from the same sudoku book.
Each cell image was resized to a matrix and flattenned into a row of our example matrix . I labeled each cell image with the number in the cell, or if the cell was empty.
I selected for the classifier. With a dataset of 1008 sudoku cells, with a split between the training and test dataset, the model achieved accuracy on the training and testing data. This high accuracy is a result of the model being trained on cells coming from the same sudoku book, leaving very little variance between each example.
Determining the row and column of each cell
I can determine which row and column each cell belongs to through a simple sort. Sorting cells by their coordinate, the first nine cells are part of the first row, the next nine part of the second row, and so on. The same logic applies to the values.
This logic works as I adjusted the sudoku grid for perspective in an earlier step. Hence, I assume that rows will remain roughly horizontal and columns roughly vertical.
Solving the sudoku
I used a backtracking algorithm to solve the sudoku. After retrieving a list of all empty cells of the sudoku grid, I test a number for each empty cell one by one. I first verify that the number is a valid move for this cell. If so, I use recursion to solve the sudoku given the guess I made for that initial empty cell. If no number is valid for a particular empty cell, I backtrack, testing a new value for the previous empty cell. This article provides a more thorough explanation of this process.
def solve(sudoku, empty_cells):"""Create a solved sudoku grid using backtracking and recursion.Inspired from https://stackoverflow.com/a/58139570/2034508"""if len(empty_cells) > 0:# Work on the first empty cellempty = empty_cells[0](i, j) = empty# Test for a solution with numbers from 1 to 9for num in range(1, 10):# Skip invalid movesif not correct(num, j, i, sudoku):continue# If move is valid, set it, and solve the sudoku from theresudoku[i, j] = numif solve(sudoku, empty_cells[1:]):return True# If we reach this point, we could not solve the sudoku with that move# Reset, and try a different numbersudoku[i, j] = 0# If we reach this point, we could not solve the sudoku with any number for that cell# Backtrackreturn Falseelse:# If empty cell array is empty, we are done!return True
Backtracking algorithms are usually equivalent to brute-force methods as most don't adopt any efficient heuristics. The algorithm I used is no different. However, for this project, it proved to be a relatively simple solution to solving sudoku.
Wrapping up
With the sudoku solved, I can then print the values of the solved grid back into the perspective corrected image. I then warp the solved sudoku image back into its original perspective using the inverse of the homography matrix found in the initial step.
You can find all the code for this small project in this Gist!
